#06 - Tips & Tricks for Designing and Structuring your TeachCenter Course
with Sections, Labels, Images and Completion Tracking
Many lecturers at the TU Graz are already experienced with using the TeachCenter but would like to make their courses more appealing and structured. Although the TeachCenter already predetermines many formatting options, lecturers have additional possibilities to structure
their courses more clearly and to visually enhance them with simple design elements. In this article, the following four design features will be introduced:
- Sections
- Labels
- Images
- Completion tracking
Using Sections for Structuring
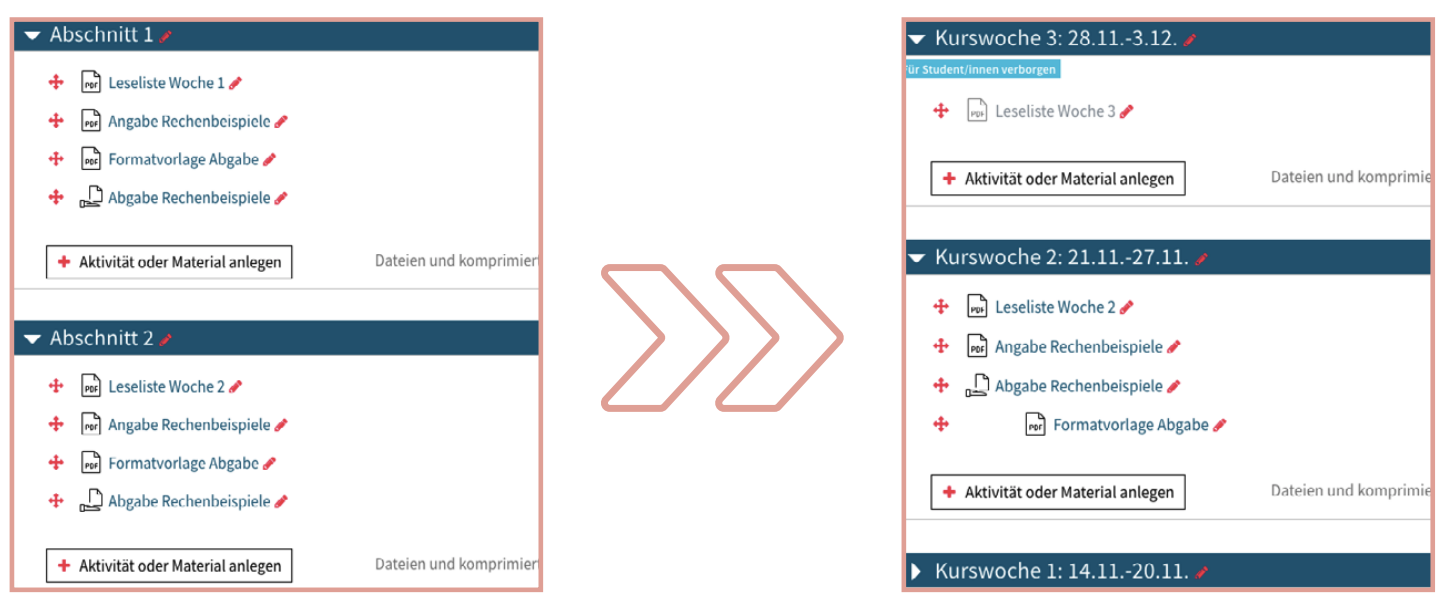
Sections are areas in which TeachCenter activities are located. A new TeachCenter course is made up of two empty sections. Lecturers can edit the section names (by clicking on the section name) or add unlimited amounts of new sections (by clicking at the bottom of the course: + Add section) and delete them (red cogwheel next to the section > Delete section). One main advantage of using several sections is the clear structure of the course content – both for lecturers and students.
To edit your TeachCenter course you always have to activate the edit mode beforehand (top right: Edit course > Turn editing on).
One main advantage of using several sections is the clear structure of the course content –both for lecturers and students.
There are several ways to organize your course by creating sections and editing their names:
- thematically: creating a section for each topic
- by participants: add a section for each group and unlock them only for the respective goup (red cogwheel on the right next to the section > Edit section > Restrict access: choose the group concerned)
- chronologically: create a new section for every week of the course

If you create a new section for each week of the course, arrange the sections from the newest to the oldest so that students do not have to scroll as long to find the latest documents and assignments.
Hiding, expanding and collapsing sections
Sections can be hidden (red cogwheel next to the section > Hide section). Hidden sections are not visible to students; for teachers they are grey yet can still be edited. By clicking on Collapse all or Expand all on the top right, all sections can be opened or closed.

Use the ”hidden“ function to fill your TeachCenter course with content in advance and release the content gradually throughout the semester. This way, the course will not be overly filled at the beginning of the semester and remains clear and organized.
Indenting activities within a section
Activities and documents within a section are listed one below the other by default. When the course editing mode is turned on, they can be moved upwards or downwards by Drag & Drop. It is also possible to indent the elements and create a horizontal arrangement by clicking the red arrow on the right next to the activity or the document.
Using Labels for Descriptions
You can insert a label to describe which materials students can find in a section and what to do with these materials (Add an activity or resource > Label). Text within a label can be formatted using the WYSIWYG (what you see is what you get)-editor or the HTML-editor:
- different font colours
- bold/italics/underline
- different paragraph styles
- bullet points
You can insert a horizontal line within the label by changing to the HTML-editor (clicking on the downwards arrow, then klicking on “</>”) and inserting “<hr>” (without quotation marks) at the desired position.
The advantage of a label over a section description is flexibility. Labels can be edited and moved more easily than a section description.
One of the advantages for students is that expectations can be clearly communicated by a detailed description of the task or section in a label. Additionally, images and icons can be added to labels.
Liven up a TeachCenter Course with Images
You can use the opportunity to include images, for example to introduce the lecturers with pictures and a short description in the first section.
Images or icons can be inserted in a label via the menu bar in the "What you see is what you get"-editor.


Keep in mind to also include an alternative text for your images to provide accessibility.
Activity Completion Tracking
Sections in which students are to complete several related tasks one after the other might look unorganized despite having named the sections and having used labels for descriptions. In this case, you can activate completion tracking for all activities that will be added to this course in the future:
- top right-hand corner: Edit course
- Edit settings
- in the section Completion tracking: Enable completion tracking: Yes
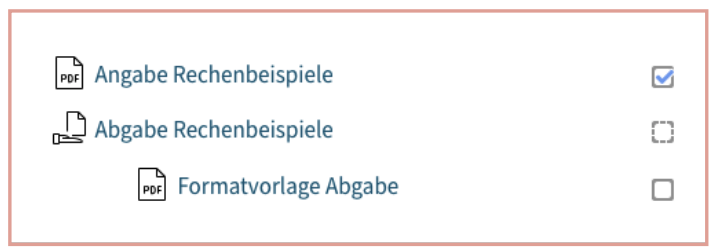
In the settings for a single activity (assignment, checkmarks, documents etc.) you can now select that the completion will be marked manually or automatically (for example on a specific date). On the main page of the course, students will then see a new space next to the activity in which they can tick a box as soon as they completed the activity.
This benefits the students as they can precisely track which tasks they have already completed.

If you have any further questions concerning particular design features, please contact the TeachCenter team.

out more about me in the FAQ.

 Maria Haas