
TUbeDrop: upload and management of videos in TU Graz TeachCenter
In this user guide you will learn how to upload videos from the TU Graz TeachCenter directly to TU Graz TUbe and how to manage them via the TeachCenter.
Video upload
To activate TUbeDrop for managing videos in your TeachCenter course, please fill out the form to request TUbe services.
If you record videos in a lecture hall, you will automatically find them in TUbe and can manage them via the TeachCenter.
If you do not want to record or stream in a lecture hall, but only want to upload videos to a TeachCenter course, please fill out the form anyway and simply leave the irrelevant fields blank. It is best to write a comment stating that you only need TUbeDrop for video uploads.
By default, there is one TUbe series per TeachCenter course.
By default, your TUbe videos have the same visibility as the corresponding TeachCenter course (restricted access, university-wide or public). If you want to change the access rights for your TUbe videos and therefore also for the TeachCenter course, please contact TUbe Support.
Note: Please do not upload video files directly to the TeachCenter as MP4 or similar formats. Instead, use TUbeDrop to manage videos.
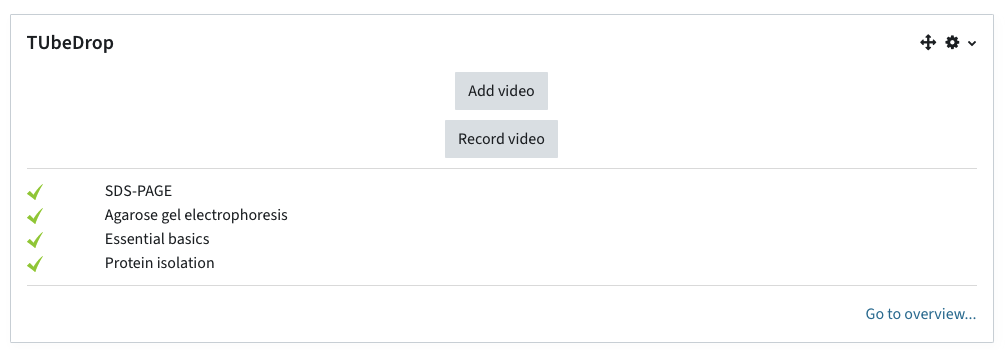
Once TUbeDrop has been activated in your TeachCenter course, you can upload videos. TUbe videos are managed and uploaded via the TUbeDrop block at the top of your course.
The block is visible only for teachers and only when edit mode is activated.

Adding a single video
Click Add Video to upload a single video.
Enter a Title for the video. In Show More, you can also adjust the name of the Presenter(s), Location, and the Lecture Date and Time. By default, the time of the upload is used for the date and time. This setting is relevant for the order of videos.
In the next section, you can set the visibility of your video.
You have the option to:
- make the video invisible for all students in the TC course,
- make the video visible for all students in the TC course,
- make the video visible only for certain groups.
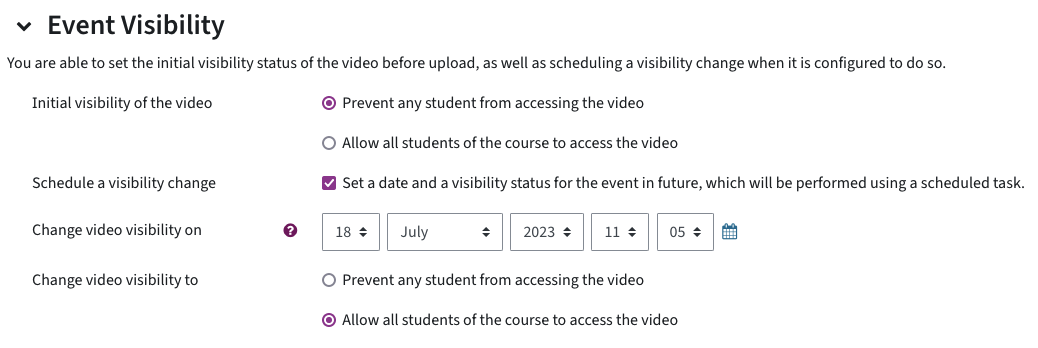
You can also schedule a visibility change. This allows you, for example, to prepare a video without students seeing it at first. At the chosen time, the video will become available to students.
Upload your video in file upload. There are two upload areas.
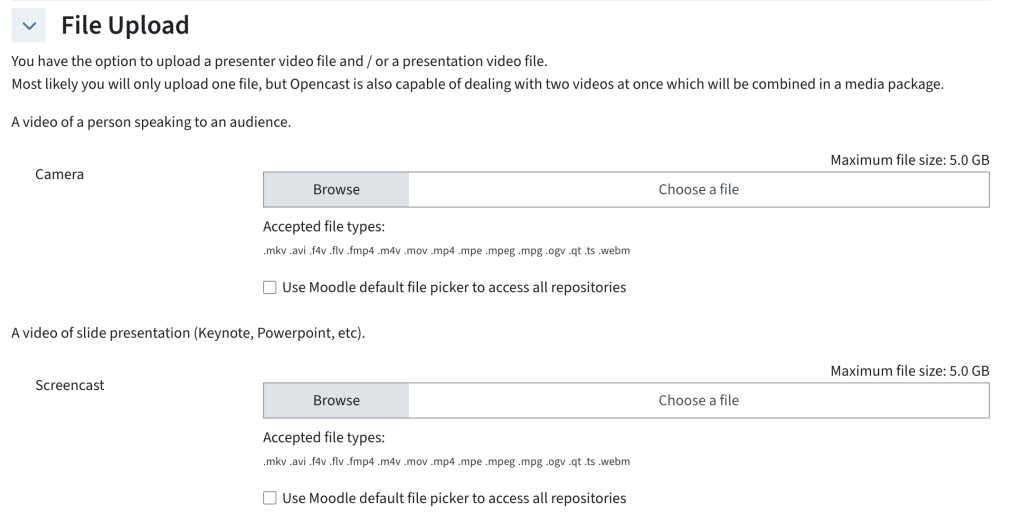
The first area Camera is for videos in which the speaker is visible.
If your video only consists of a PowerPoint presentation or similar, please upload your video in the area Screencast. The reason for this is that the text of the presentation can be made searchable.
If two parallel videos are available (e.g. from the TUbe Recorder), both files can be uploaded at the same time.
Click Add video.
Uploading several videos at once
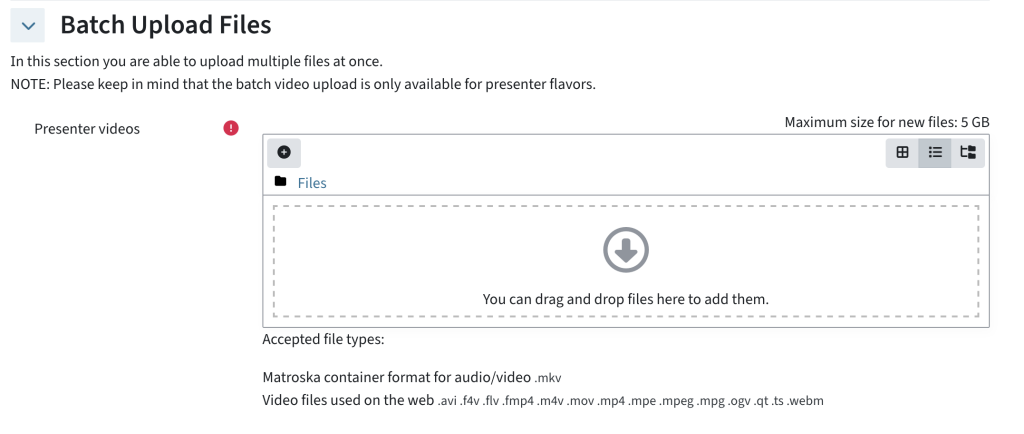
To upload multiple videos, click Add videos (batch).
You can again specify metadata (teacher, location, etc.) for the files. These will be applied to all files.
In the Batch upload files area, you can insert multiple files from your computer using drag and drop, or you can add multiple individual files via the file selection.
Video administration
Students cannot see the TUbeDrop block and need a separate link to the TUbe series or individual videos.
When activating TUbeDrop, the support team creates a TUbe section with a link to your TUbe series. Students can use this link to go to TUbe and watch the videos directly on TUbe. You are welcome to move or rename this link.
You can also link or embed individual TUbe videos in the course.
You and your students can find all videos from all courses you are enrolled in directly on TUbe.
The TUbeDrop block always shows the five latest videos. By clicking Go to overview... or More videos... you will get an overview of all video files that are available for this course.

The Names of the videos are linked to the videos on TUbe.
The Status column shows the status of your uploads:
- A green check mark indicates that the upload to TUbe was successful and that the video is available on TUbe.
- A yellow clock means that the video is being processed. If the clock does not turn into a green check mark after several hours, please contact the support team via the speech bubble.
- An exclamation mark in a red triangle means that an error has occurred. Please contact the support team via the speech bubble.
- The calendar icon indicated a scheduled event, e.g. a recording in a lecture hall.
The Visibility column shows whether a video is currently visible to students ("open" eye) or hidden from students (crossed out eye).
By clicking the speech bubble, you can directly contact the TUbe support team to notify them about any issues with a video.
In your TUbeDrop block, click Go to Overview or More Videos...
You can display videos for all students, hide them from all students, or make them visible only to certain groups.
Please note: Visibility can only be changed for videos that are ‘restricted,’ i.e., videos that can only be viewed by course participants. If you would like to change the visibility of your public or TU-wide videos, please contact the TUbe team.
Changing the visibility of individual videos
By clicking the eye icon in the Visibility Column, you can change the visibility of individual videos.

Changing the visibility of several videos at once
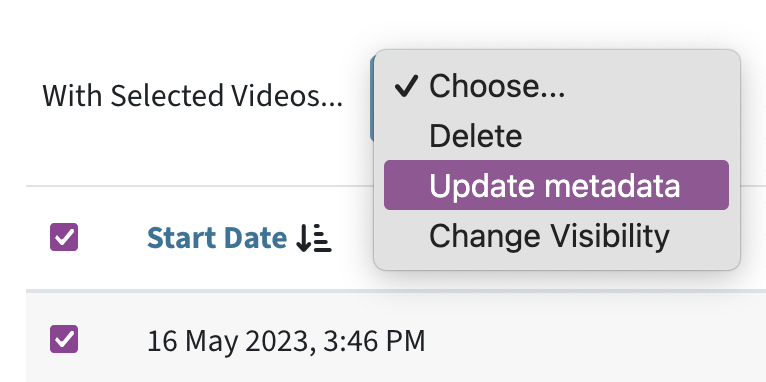
Select several videos with the checkboxes in the first column. Choose With selected videos... > Change Visibility.
Making videos visible to a whole second TeachCenter course
If you would like to give all students of a second TeachCenter course access to the videos of your series, please contact the TeachCenter support. We can link your TUbe series to a second course.
Please note that users with editing rights can then also edit (and delete!) TUbe videos from inside the second course.
The video name is displayed to students on TUbe. The date is used to sort the videos and assign them to semesters on TUbe.
If you want to reuse older videos, you can simply adjust the date or year so that they are listed in the current semester.
Change the title or date of individual videos
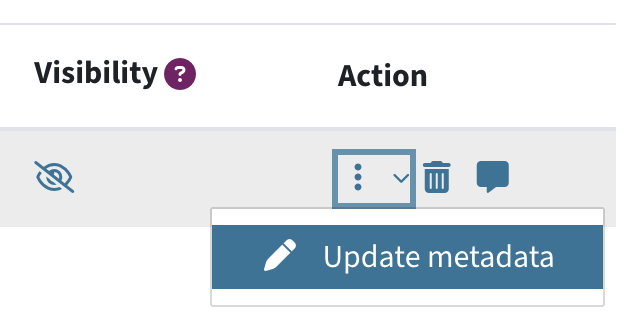
In the overview, click on the three dots in the Action column > Update metadata and edit the title and course date.
Change metadata for multiple videos
Select the videos you want to edit by selecting the checkboxes in the first column. Click With selected videos...> Update Metadata.

You can only change the teacher, room and date with mass actions.
Videos that have been fully uploaded/published (green checkmark in the Status column) can be deleted by clicking on the trash can in the list of videos. Please note: Deleting TUbe videos cannot be undone!

TUbe videos are also deleted after 5 years by default. The TUbe team will contact you before final deletion. The videos can then be exported for archiving.
Help & Contact
For questions on TeachCenter / TeachCenter Exam: tc@tugraz.at
Frequently asked questions are also answered in the TUbe FAQ.
For questions on lecture recordings + TUbe: tube@tugraz.at
Licensed under a Creative Commons Attribution CC BY 4.0 International
 TU Graz Educational Technology